Visual System:
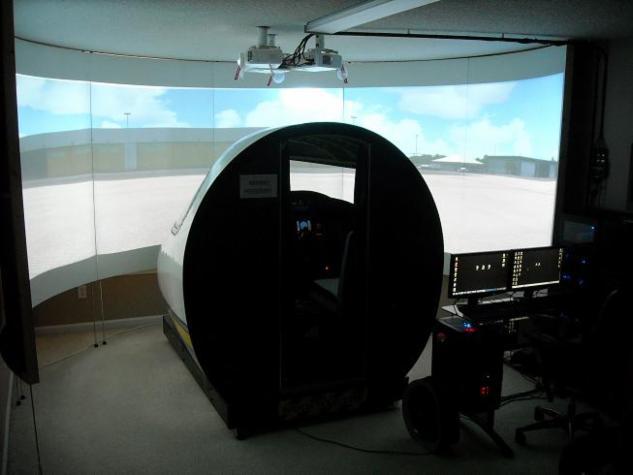
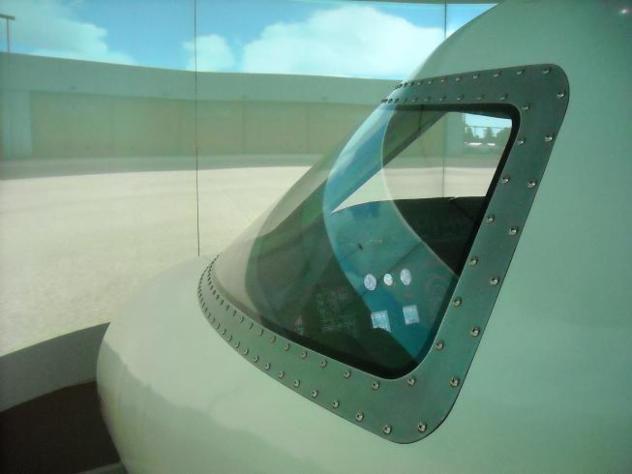
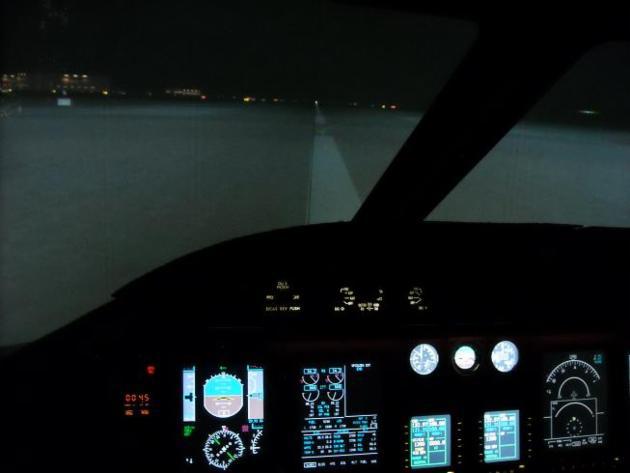
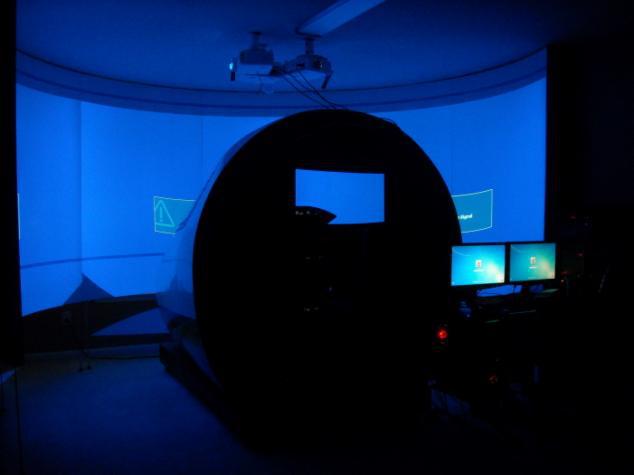
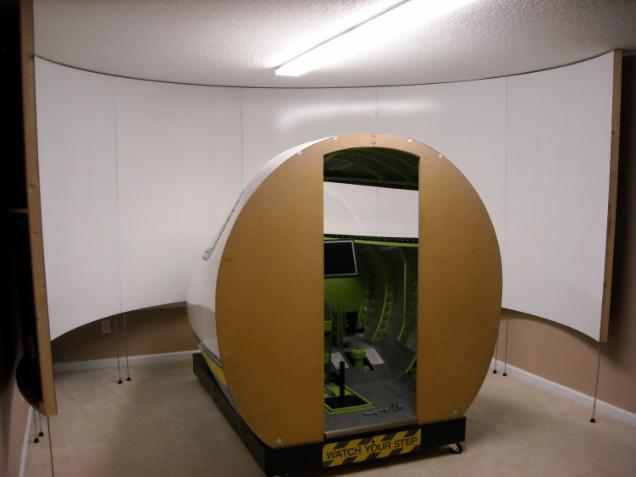
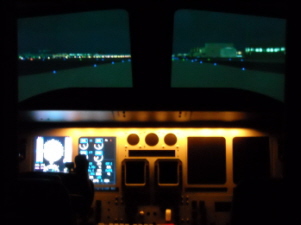
September 7th 2013: The visual system over the past year has made some serious progress. I have posted most of the details over in the hangar. Here are a few updated photos of the visual system.
ST PROJECTOR LIST DATED 12-28-11
BRAND MODEL 16:10 DST NATIVE RES A/R LUMENS CONTRAST C OFFSET PRICE
MITS EW230U-ST 3' 7” 1280X800 16:10 2500 2,000:1 2.7" $650
BENQ MP780ST 3' 7” 1280X800 16:10 2500 3,000:1 2.8” $1045
BENQ MP782ST 3' 6” 1280X800 16:10 2500 2,400:1 2.7” $1169
BENQ MW811ST 3' 6” 1280X800 16:10 2500 4,600:1 2.7” $849
BENQ MW814ST 3' 6” 1280X800 16:10 2500 4,000:1 2.7" $820
INFOC. IN146 3' 6” 1280X800 16:10 2700 3,000:1 2.7” $711
VIEW. PJD7583W 3' 6” 1280X800 16:10 3000 3,000:1 2.6” $719
I chose the Mitsubishi EW230U-ST which was a great choice at the time because they will get the job done and get me flying with a decent visual sytem without paying a ton of cash. (I need three projectors) My hopes are that in five years time, projector technology will continue to advance and the prices will continue to fall. Keep that in mind when you make your selection.
NOTE: When using a 12' diameter curved screen, we must use 16:10 Aspect Ratio. All projectors must be set on the same plane and NO Key stoning can be applied.
NOTE: 12' DIA = 85” X 53” per projector = 4,505 square inces per projector. From the table below, you can see how important higher resolution is.
NATIVE RES PIXELS PIXELS PER PROJECTOR
800 X 600 106 PSI 477,530
1024 X 768 144 PSI 786,432
1280 X 800 227 PSI 1,024,000
1920 X 1080 511 PSI 2,302,055
NOTE: The higher the resolution, the better quality image you will have. A 800 X 600 Native Resolution projector will make it look like you are looking at the image through a screen door.
Fun fact: There are 3,072,000 pixels when using a three projector system in 1280 X 800 Native Resolution on a 12 foot diameter screen system. That is a lot of pixels for the computer to render up to 60 times per second!
I have known for a while now how I am going to build my visual system, but thanks to the recent work of Ivar Hestnes, it is now clear to me and everyone else for that matter how to create the best environmental visuals possible for a home built flight simulator. Although Ivar is building a 737 cockpit, the outside environmental views and rules should cross over to the Lear45 with no issues. By the way, Ivar has one of the best looking shells and overall projects out there in my opinion!
Ivar, has found the perfect combination of equipment, distance, radius and angles to achieve 225 degrees of FOV (field of View), which might as well be a full 360 because it is, after all, kind of hard to see where we were just flying. He is using a 2.35 meter (approximately 14 foot) diameter curved screen with three MP 782st short throw Benq projectors. The great thing about these projectors compared to a standard one is that you can place them closer to the screen and still project a larger image. In Ivar's sim, his projection reaches from the ceiling to the floor which is eight feet vertical! From the pilot's POV, (Point of View) every angle is covered for the outside visuals, incredible!
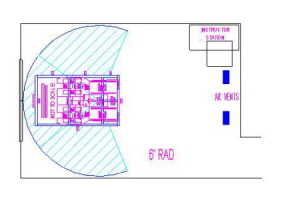
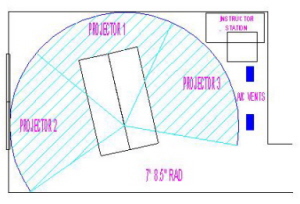
Here are two proposed projection layouts that I have been working on with the space that I have. Drawing #1 has a six foot radius and gives me half of the space in the room for other things. Drawing #2 is Ivar's proven 7' 8.5" radius which in my case, becomes the room! I will not know for sure which direction I will be going until I get the projectors in hand and start testing.
These three projectors are plugged into a TH2GO (TripleHead 2 Go system) which only requires one computer to run because the views are undocked and as far as the computer knows is using one monitor output. There is also a software program which allows the images from the three projectors to be curved and maintain their focus.
My job will be to see if I can achieve everything that Ivar has done but possibly on a smaller diameter screen. Because the 737 is much larger than the Lear45, I may be able to achieve the same effects but with a smaller diameter screen. The only reason why it may be better to just leave it as is, (2.35m) is to keep the full eight foot vertical view. I am very excited to start the work on this but it is going to have to wait until December 2010.
March 1st 2010: Now that I have the shell completed, I have been able to move forward with other aspects of the project including the visual system. I could not help myself but to get the shell wired up for it's first test flight! Currently, I am using one overhead projector and one LCD screen. I am using a video card to split the image in two. I have them "stacked" on top of one another and then I pull the pilot DU's down into the LCD screen inside the cockpit. It is simple enough and will get the job done for now until I have my four computers needed to run the entire visual system.

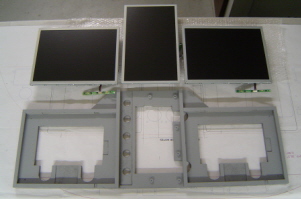
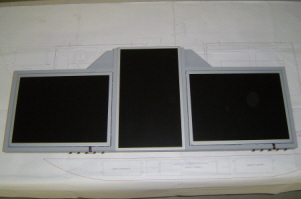
May 18th 2009: The moment I have been planning for over the past four years! Putting the three LCD screens side by side by side!
I spent the past five days working on the MIP Backer support. I had a solid idea in mind but it took about three attempts to get it to the stage pictured below. It is made of half inch MDF and is designed to hold two 15.6" standard LCD's and one 15" wide view in portrait mode. This setup is the only one known that covers everything that needs to be covered, keeps the MIP at 100% to scale AND allows everything to be modeled such as the GWPS FAIL, Davtron clocks, Audio Control Panels and the AOA gauges without being impeded on by the LCD monitors.
I have to thank Vince and his brilliant work on the Display Units and RMU's. He has designed all of the buttons to be integrated into the units themselves. This means it does not matter if there is LCD screen behind the lower parts of these units or not. However, I will tell you that if you want to go another route and use larger mechanical buttons that require more room behind the Display Units, you can use 15" wide screens on both sides. The only catch is you either sacrifice the GWPS FAIL or you have to move it further outboard, which means the MIP is a little out of scale.
While working on this MIP backer unit, I paid special attention to strength, ventilation, wiring and sound dampening issues. Not pictured yet, I plan to put 1/8th inch thick, half inch wide rubber or foam around all of the LCD's to keep the aluminum MIP from rattling against the LCD bezels.

I am using a piece of equipment called TripleHead2Go Digital which allows me to take a single video feed and send it off to three ST projectors creating a stretched screen with a maximum resolution of 5760x1080. Listed below are some other key featrues of this product:
- Lets you connect up to three monitors to the single Dual-link DVI or VGA video output of your system
- Creates a stretched desktop with a maximum resolution of 5760x1080 (3x 1920x1080)1,2 across three displays or 3840x1200 (2x1920x1200) 2 across two
- Uses your system's existing GPU to deliver a solid platform for office, 3D design, multimedia and digital signage applications
Contact Us Today!
Email:
Please visit Hangar45 for all the latest news in the Lear45 simulation world. There you can meet with all the L45 builders and watch their projects unfold!
Project45 Products and Pricing Page coming soon!
"In the meantime, please email me for the latest Project45 Products and Pricing Guide and I will get a PDF copy out to you ASAP!"